Guides
PayneXR to TriCaster: complete 2026 workflow
Build a paynexr to tricaster workflow with verified routing, preview checks, and a clean-feed fallback. Test on-field graphics before taking them live.
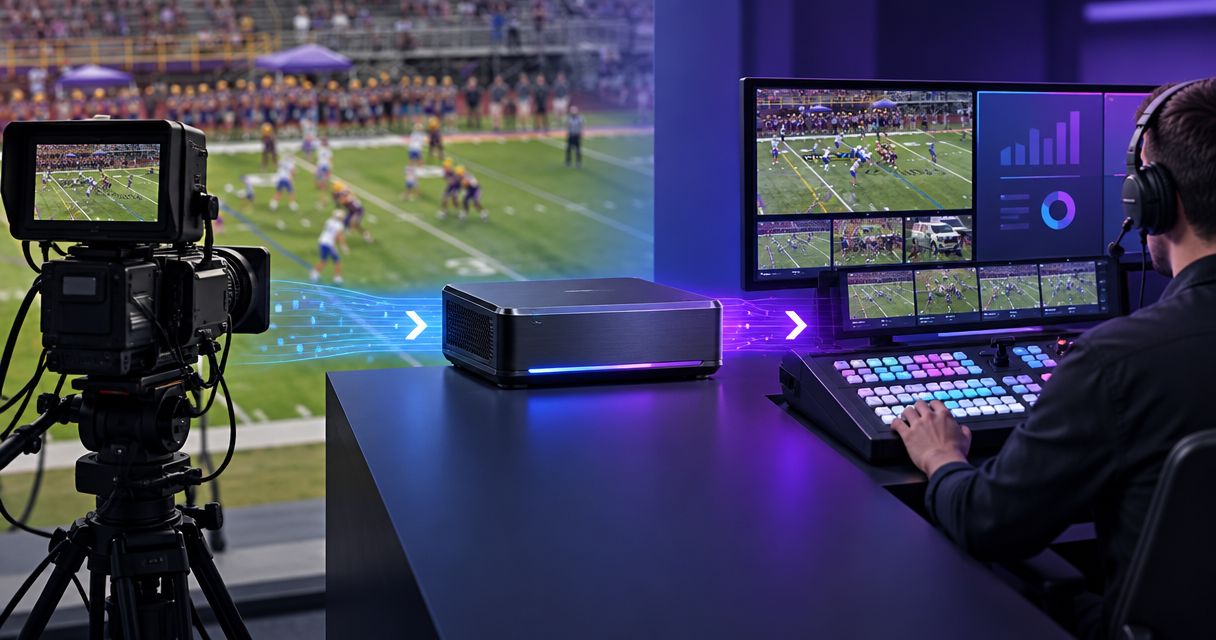
Instead of rebuilding football graphics around each live switch, build a paynexr to tricaster workflow that returns the graphics-bearing video to a dedicated TriCaster input while preserving a clean camera feed. Verify the connection supported by your installed equipment, check the return in preview, and rehearse the clean-feed switch before putting on-field graphics on air.
TL;DR
- Build your paynexr to tricaster workflow around a verified video connection and a separate clean-feed fallback.
- PayneXR adds virtual first-down lines, scrimmage lines, logos, and sponsor graphics to live football video.
- Check the graphics return in TriCaster preview before sending it to program.
- Keep graphics off unsupported camera views and verify line placement before each play.
Why this matters
PayneXR is Windows broadcast graphics software for adding virtual first-down lines, scrimmage lines, logos, and sponsor graphics to football video. TriCaster handles the production switch; the integration task is getting the right video into the graphics stage and returning the right picture to the switcher.
PayneXR is best for football broadcast teams that want on-field graphics and can assign responsibility for their placement. Adding graphics also adds a signal path to check and an operator task to manage.
For your 2026 production plan, compare that added responsibility with broadcasting without on-field graphics—not with an unverified claim about another application.
| Production approach | Best for | Advantage | Limitation |
|---|---|---|---|
| On-field graphics | Crews with a defined graphics operator and tested routing | Places lines and sponsor graphics within the football picture | Requires placement checks, return monitoring, and a fallback |
| No on-field graphics | Crews prioritizing a simpler production | Removes the graphics-processing stage from the camera path | Does not provide virtual field-position lines or on-field sponsor graphics |
A school crew needs a repeatable handoff. An independent streaming crew needs a setup it can transport and rebuild. A TV broadcaster needs clear routing and production responsibilities. All three need an immediate way to stop showing an incorrect graphic.
Before you start
- Prepare the equipment and access. Have access to the Windows graphics computer, the installed software, TriCaster session configuration, camera connections, and the documentation for every video interface in the route.
- Confirm the connection before wiring. Verify the graphics application's supported input and output methods against the actual TriCaster model and any intermediate hardware. A software name, network socket, or matching connector does not establish compatibility.
- Keep the clean feed independent. A clean feed is camera video without on-field graphics. Preserve a route to TriCaster that does not depend on the graphics application's output; otherwise, switching inputs will not bypass a failed graphics stage.
Record the installed versions in your 2026 setup sheet. Use instructions for those versions rather than assuming another crew's screenshots match your system.
Signal-path configuration
Define the camera and graphics routes
- Identify the camera view intended for field graphics. Start with the view your operator can inspect reliably, rather than enabling graphics across every camera immediately.
- Draw the proposed graphics route: Camera feed, Graphics processing, Graphics return, and TriCaster input. Graphics return means the video coming back from the graphics stage.
- Draw a separate Clean feed route into TriCaster. Check every shared device; a supposed bypass is not independent if it still passes through the failing processing stage.
- Identify the source feeding the graphics computer. Do not send a finished program output back into a path that returns to that same program output. That creates a feedback loop.
- Assign responsibility for changing the source, placing lines, and calling for a clean-feed switch. One person can hold several roles, but each action needs an owner.
Expected result: You can trace the graphics picture and the clean picture from camera to TriCaster without guessing which device supplies either one.
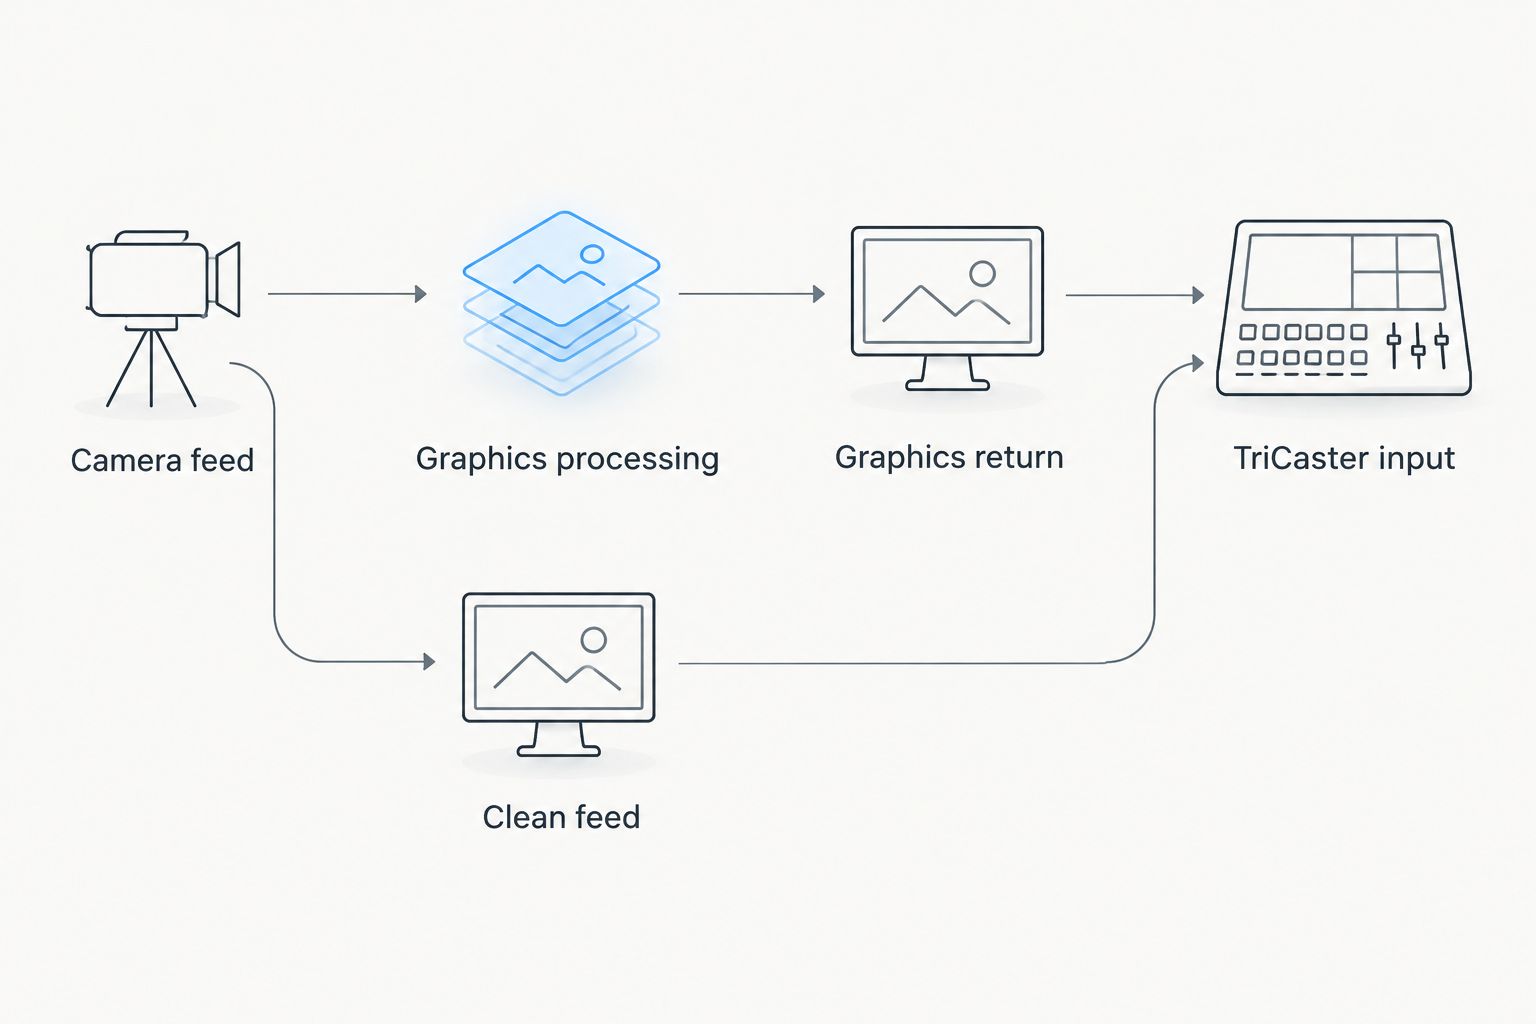
The clean-feed route bypasses the graphics-processing stage.
Match the video format
- Read the camera's actual output format. Record resolution, frame rate, and whether the signal is progressive or interlaced; progressive video displays complete frames, while interlaced video divides the picture into fields.
- Check what the graphics input accepts and what its output supplies. Identify any conversion instead of assuming matching resolution means matching signals.
- Check that the receiving TriCaster input supports the returned format through the chosen connection. Include adapters and conversion devices in this check.
- Watch motion as well as a static field. A frozen image can look correct even when a live path is unstable.
Expected result: The receiving input displays continuous video with the intended framing and no unexplained format conversion.
Do not change several settings together. Change one part of the route, observe the result, and record what fixed the problem. That record becomes useful when another operator rebuilds the production.
Graphics-return configuration
Establish the return before adding lines
- Connect the graphics output using the method confirmed for your installation. Follow the relevant device documentation for physical connections or source discovery; do not substitute a connection because another production uses it.
- On TriCaster, configure the intended receiving input using the instructions for your model and software version. Use a recognizable source name wherever the system permits naming.
- Select that input on Preview, the picture inspected before it goes on air. Keep the production output on the clean source during setup.
- Confirm what the return contains: a complete camera picture with graphics, or a separate graphics layer requiring compositing. Compositing means combining separate image layers. Do not treat these as interchangeable signal types.
- For a complete picture, inspect the picture directly. For a separate layer, verify the documented compositing procedure and transparency behavior before continuing.
Expected result: Preview shows the intended picture, and you know whether TriCaster is receiving finished video or a layer that needs combining.
A black background is not proof that a graphics layer is ready to use. Likewise, a visible line on the Windows screen is not proof that the correct output is reaching TriCaster. Check the receiving input itself.
Verify on-field placement
- Start with a field view where yard markings are easy to identify. Follow the installed application's documented placement procedure; use the control names shown in that version.
- Place the scrimmage line and first-down line against the intended field positions. Confirm the positions with the person tracking the game situation.
- Inspect the return during a camera pan and zoom. Do not assume camera tracking, automatic repositioning, or player masking unless those behaviors are documented and demonstrated in your setup.
- Watch how the graphic crosses players, officials, and field markings. If the result is distracting or misleading, hide the graphic and correct the setup off air.
- Hold a settled field view for 30 seconds, then watch 10 seconds of camera movement. These are rehearsal checks, not software performance specifications.
Expected result: You have demonstrated which views support usable placement and which require graphics to remain hidden.
For your 2026 acceptance check, write down the usable camera view and any restrictions. An operator needs actionable instructions such as hiding graphics before a particular camera change—not a vague note that the system works.
Preview, program, and fallback configuration
Rehearse the on-air switch
- Put the clean camera picture on Program, the output sent to viewers. Put the graphics-bearing source on Preview.
- Compare both pictures. Check framing, line placement, and visible timing differences. Audio and video can travel through different processing paths, so verify synchronization at the production output.
- During rehearsal, take the graphics-bearing source to program using your established switching procedure. Watch the actual program monitor, not just the graphics computer.
- Switch back to the clean feed without changing the graphics application's configuration. Repeat the fallback 3 times so the director and graphics operator can rehearse the call.
- Agree on an unmistakable spoken instruction for removing graphics. Also decide who can request that switch when placement becomes wrong.
Expected result: The crew can show graphics, remove them, and continue the broadcast without rebuilding the route.
Keep the clean-feed switch simpler than the graphics setup. For a detailed routing check, use the guide to preparing a clean-feed fallback for football graphics.
Do not make the fallback depend on closing software or disconnecting a cable during a play. The operator should select an already-tested source.
Variant: update lines between plays
The second workflow uses the same routing but changes when the operator updates and reveals graphics. Use it when field positions change between plays; do not assume the application receives automatic game data.
- Hide the field graphics or keep the clean source on program while the operator checks the next situation.
- Confirm the ball position, direction of play, and line to gain—the position the offense must reach for a first down.
- Update placement through the application's documented controls. Check the graphics return against visible yard markings.
- Show the graphics only after the operator confirms both placement and the active camera view.
- Remove the graphics before an unverified camera angle or replay. Reintroduce them only after checking the new picture.
Expected result: Each update has a confirmation point before viewers see it.
A school team can put these calls on a shared cue sheet. An independent crew can combine roles only after rehearsing the workload. A TV production can separate placement confirmation from the director's decision to take the source.
For the 2026 operator briefing, demonstrate a wrong-position correction as well as a successful update. The correction reveals whether the crew understands who hides the graphic and who approves its return.
Troubleshooting
No graphics return appears in TriCaster
Trace the route from the sending output to the receiving input. Verify the selected output, physical or network connection, receiver configuration, and supported video format in that order. Test the receiving connection with a known working source before changing graphics placement.
The return has a black background
Determine whether the output is finished camera video or a separate graphics layer. A layer needs the documented compositing setup; a finished video return needs a valid camera picture upstream. Do not compensate by changing unrelated transparency settings at random.
Lines look right when still but wrong during movement
Hide the graphics and repeat the pan-and-zoom rehearsal. Check documented positioning behavior and your camera-view restrictions. Keep graphics off any view that fails the test rather than assuming an automatic tracking capability.
Audio no longer matches the picture
Check synchronization at the final program output. Identify where audio and video separate, and inspect any documented delay controls in the production chain. Measure and correct the mismatch through the supported process rather than adding an arbitrary delay.
Video repeats inside itself
A repeated picture can indicate feedback. Remove the returning program source from the graphics input path and restore a camera source that does not contain the graphics return. Recheck the signal drawing before taking that route back to air.
Customize your workflow
Expand the production only after the basic camera, graphics, and clean-feed routes pass rehearsal. Add logos or sponsor graphics separately so you can identify which change introduced a problem.
For school football, prioritize a readable handoff sheet and a trained replacement operator. For independent streaming crews, label cables and save the connection plan with the equipment. For TV broadcasters, include graphics removal and return approval in the production calls.
Your 2026 workflow record should name the camera source, supported connection, video format, return input, clean input, and responsible operator. Keep a copy accessible without relying on the graphics computer.
PayneXR football broadcast graphics belong in a production process that makes incorrect placement easy to remove. More graphics are not a substitute for a verified picture.
FAQ
How do I build a paynexr to tricaster workflow?
Build a verified video route from the camera through the graphics stage to a dedicated TriCaster input, while preserving a separate clean feed. Check the return in preview and rehearse switching back to clean video before broadcasting.
Does PayneXR connect to every TriCaster model the same way?
Do not assume the connection is identical across TriCaster models. Confirm the supported input and output methods for the installed graphics software, TriCaster version, and any intermediate hardware before wiring the route.
Should I send finished video or a separate graphics layer to TriCaster?
Use the output type documented for your installation and configure the receiving path accordingly. Finished camera video and a separate graphics layer require different handling; a separate layer needs a verified compositing setup.
Can one person switch cameras and operate football graphics?
Combine the roles only after rehearsing the workload successfully. If graphics checks interfere with camera switching or game coverage, assign another operator or broadcast without on-field graphics.
What should I do when a first-down line is wrong?
Hide the graphic or switch to the clean feed immediately. Correct the position off air, verify the active camera view, and confirm the return before showing the graphic again.
Do I need to test camera pans and zooms?
Yes, test camera movement before showing field graphics during a game. A line that looks correct on a stationary shot does not establish that placement remains usable during a pan or zoom.
Is broadcasting without on-field graphics a valid fallback?
Yes, a clean camera feed is a valid fallback when graphics placement or processing fails. Test that route independently so removing graphics does not interrupt the production.
One last thing
Rehearse failure before adding another graphic. Ask the graphics operator to stop updating during practice, then have the director switch to the clean source and continue coverage. A production is ready when the crew can remove an unreliable picture without losing the game.